Reviving Sourdough Starter | Breathe New Life into Your Fermented Delight
If you’re like me, you’ve probably gone through your fair share of Sourdough Starters and need help perfecting the technique. You might have been discouraged by a failed loaf of bread or just lost the motivation to keep up with it. But if there was a time to commit to baking, now is that time! It's rewarding in more ways than one; not only do you get delicious homemade bread out of it, but you can also enjoy and appreciate the process of reviving an ancient food tradition, bringing new life into something old and forgotten. In this blog post, I will walk through all the steps to return a defunct sourdough starter from dormancy. So let yourself rekindle your passion for baking and join me on this journey to show you how to restore life to our beloved wild yeast friend, Sourdough Starter.
Maintaining a healthy sourdough starter can be tedious but well worth it when that fresh loaf of freshly baked bread comes out of the oven. Even if mistakes are made from time to time, there are simple tricks that can keep a sourdough starter healthy and reduce the chance of mold. I have outlined below all the tools you need to start and maintain a healthy starter: daily feedings if left at room temperature with flour and water, store in an airtight container after each feeding, refresh the starter every other day unless your recipe calls for more, discard old batches before making new ones. Above all else, understand that, like most living things, sourdough starters require care and patience. With some know-how and dedication and my tips on reviving a Lievito Madre sourdough starter, you'll have delicious bread ready for baking in no time.
Here’s Why You’ll Love This Recipe
You can revive your sourdough starter in less than a week.
Your sourdough starter will become stronger than it was before.
You can even use this same method to turn an existing sourdough into a Lievito Madre.

Reviving Sourdough Starter | Breathe New Life into Your Fermented Delight
Ingredients
Instructions
- Take 105 grams of your existing starter and add it to the water and flour. A wet, sticky dough will form, and you can use a little extra flour to dust the piece of dough so that it doesn't stick to your hands, roll it into a smooth ball in the palm of your hands, and then place it into a clean 1/2 liter jar with a tight lid.
- Let the jar sit in a warm place (around 77-80F) for exactly 24 hours before proceeding to the next step. If you do not have a warm place like the Sourdough Home by Brod and Taylor to use, you can quickly wrap the jar in three medium-weight tea towels and place it at the back of your kitchen counter until the next day. Do not use your oven light or proof setting.
- Take all the starter from day one and mix it with the water and the flour.
- Dust the dough again with a little bit of extra flour and roll it into a smooth ball in the palms of your hands.
- Place the starter into a new, clean 1/2 liter jar with a tight lid and let it sit again at 77-80°F for 24 hours, or wrap it in three tea towels to keep it warm.
- You should start noticing activity on this day, if not on day 2. If on day 4, you find that your starter has not doubled and is not bubbly when you check on it 24 hours after refreshing on this day (Day 3), repeat day three measurements for a few more days until this happens and before proceeding with the next step (Day 4).
- Take all the starter from day 2 and mix it with the water and the flour.
- Dust the dough again with a little bit of extra flour and roll it into a smooth ball in the palms of your hands.
- Place the starter into a new, clean 1/2 liter jar with a tight lid and let it sit again at 77-80°F for 24 hours, or wrap it in three tea towels to keep it warm.
- When you check on your starter today after it has sat for 24 hours since its feed on Day 3 and notice that it has doubled and looks bubbly, you can go ahead with the following steps.
- Take 30 grams of the starter from Day 3 and discard the rest.
- Mix the starter with the flour and water. This time the dough will be thicker, like play dough, so knead until all ingredients are well incorporated and then roll it into a smooth ball.
- Place the starter in another clean 1/2 liter jar with a tight lid and let it sit at 77-80°F or cover it in three tea towels for 24 hours.
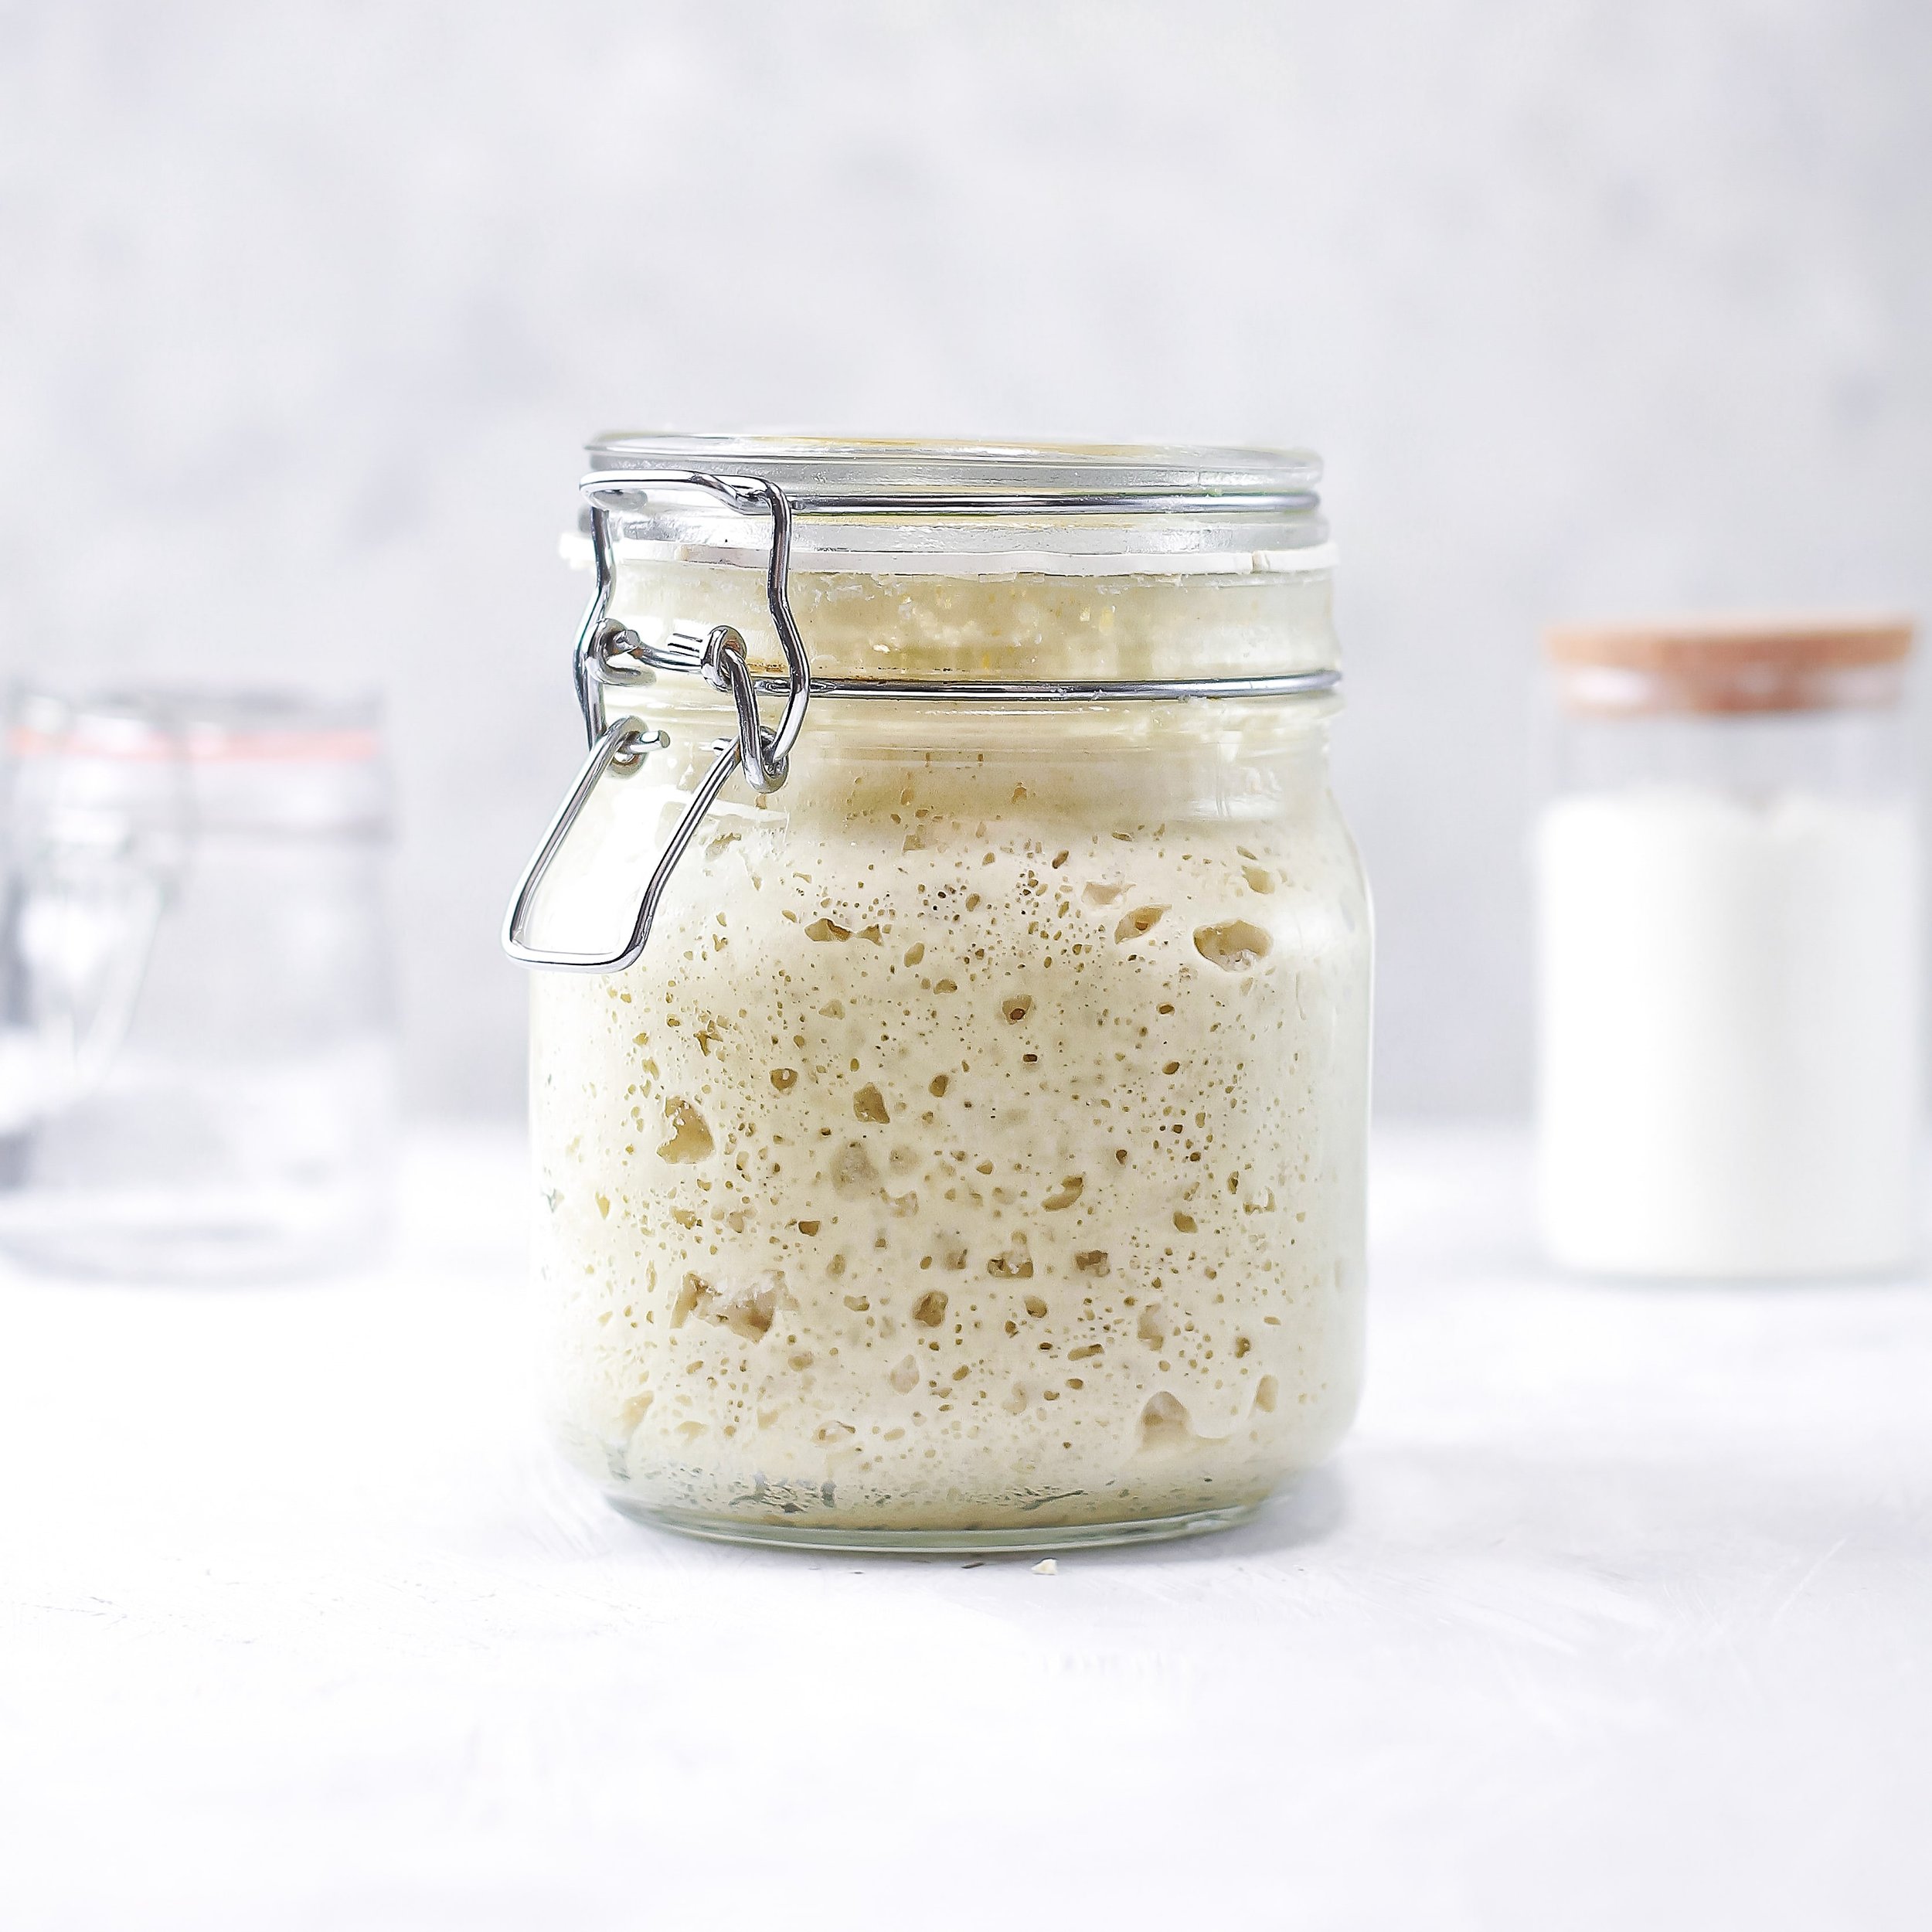
- Today the starter should have doubled or tripled in size, and you may see holes that look like craters around the starter and on the top. Today will also be your official refresh day.
- Refresh the starter by taking 30 grams and discard the rest.
- Mix it into the water and flour and knead it well.
- Roll it into a smooth ball and place it into a clean 1/2 liter jar with a tight lid.
- This time the starter only needs to rise for 6-10 hours, and as long as the Lievito Madre performed as suggested on the previous days, your starter should double or even triple within these 6-10 hours.
- After 6-10 hours, you can place the starter in the fridge for the week. You can then begin using your Lievito Madre as you did before your starter weakened or dormant, and remember to feed her at least once a week when you are down to your last 30 grams of starter in your jar.
- Congratulations! You just brought your starter back to its full potential, and if you used this guide to transform an existing starter into a Lievito Madre, you are about to love its simplicity. Read more about Lievito Madre Here and how easy it is to use compared to a higher-hydration sourdough starter.
Nutrition Facts
Calcium
11.3 mgIron
0.45 mgManganese
0.36 mgVitamin B3
0.56 mg


Discover the Magnifique Claypot Oven, the must-have kitchen appliance for busy moms and home cooks! Enjoy healthy, flavorful meals with ease thanks to its modern claypot technology. Save time, simplify meal prep, and elevate your cooking. Find out why this oven is the perfect addition to your kitchen today!